
Metal Detecting Inland and Beach
Hopefully the advice and tips here
will help you to avoid making a bad purchase or if your an experienced
detectorists you may find something of interest.

METAL DETECTING
INLAND
Before You Buy:
Before you buy your first machine there are a few things you should think about. How much time do you think you will spend metal detecting. If you plan to detect a lot of hours a week then go for a machine that has more features than a machine where you will only be spending the odd few hours on a Sunday. The more features a machine has the more it will cost so if its just a bit of fun you want then go for a basic machine..
What is your budget. Remember as well as buying the machine itself, there will be other costs for accessories you may need like headphones, digging spade, beach scoop, control box rain covers and batteries.
Where do you intend to use it. If you live on the coast a machine for beach detecting maybe a good choice for you. There are machines specially designed for wet sand detecting called PI machines (Pulse Induction).
Most machines are designed for inland detecting and they also perform well on the dry sand of a beach.. There are also some machines that will do both, inland and wet sand. So keep this in mind before you buy.
Do you want a basic switch on and go machine, or do you want more features.
Consider the weight of a machine, some are heavier than others and will effect how long you can detect.
Decide if you want to buy brand new or second hand. Weigh up the pro's and con's.
Join a metal detecting forum on line. There you will meet fellow detectorists who will give you unbiased advice on all aspects of metal detecting.
Read reviews on the internet to give you some idea what controls a machine has and what they do.
No one machine suits everyone, there is a vast range out there. Think about a machine that will meet your own needs.

Buying Your First machine:
Forget about buying one of those cheap ones in toy shops, really, that's
all they are, toys. You will soon get fed up with them. Expect to pay
around £150 for a good basic starting machine that will find you stuff.Don't get caught in the money trap. A £300 machine can perform as good as a £600 machine. Just the latter has more 'bells and whistles' and that's what you pay for. Ok if you want more bells and whistles mind.
If buying new, buy from a reputable dealer. That way you will have a warranty on the machine with good after sales service.
Best to buy within the UK just in case of problems that can occur with machines and need to be returned.
Some machines are switch on and go, others need setting up and programing. How good are you at modern technology.
Check out the kHz ratings in the specifications on different machines. Basically, the normal kHz rates for our detectors are 3 kHz to 19 kHz. The lower end say 3-6 kHz machines are better at finding larger and thicker coins and are not effected so much by ground mineralisation, but the recovery speed is slower. The higher end say 16 kHz-19 kHz are better at finding small thin coins and the recovery speed is faster. The middle range 7 kHz - 15 kHz are neither the fastest or the deepest, but do not suffer from some of the problems of the other two ranges. In fact, this middle range kHz are responsible for most of the finds ever made.
Using Your New Machine:
Now the day has come when your new machine arrives and you set it up..
Don't rush out detecting willy nilly to test it. First you have to
understand it and see what it does, read the instructions and then the
best place for testing is in your own garden. Do a test bed and bury a
few coins a couple of inches deep and sweep over them and listen to the
signals. Then bury some trashy stuff like a bottle top, nail or a rusty
bit of iron. Listen to the different signals and get used to the
controls.Now you can go out proper detecting. Try and find an area that's not overloaded with signals as that will drive you barmy. Find a field or the dry sand of a beach, that will be less contaminated making it easier to learn.
Keep your machine in All Metal Mode for a while and dig every signal. That way you will see what the different sounding signals are relating to which objects. You can slowly learn the discrimination and sensitivity controls later.
Don't expect finds every time you go out. You will have bad find days like us all. The usual pattern is at first you will spend hours only finding trash items, drink cans, old rusty iron, silver paper, bottle tops or maybe an odd decimal coin or two. Then as you get more experienced, amongst the trash you start finding average finds like old pennies, buckles, buttons or some other artifacts. These are finds that inspire you and before long your finding nice old coins, interesting artifacts, great pieces of history. Then one day, you dig up something that makes you feel total excitement, I mean real excitement to get you dancing and that's the hint of silver and gold.
Keep your coil as low to the ground as possible. If your swinging your coil three inches above the ground, you are losing three inches depth under the ground.
Remember: Slow and Low. From my own experience and confirmed by many detectorists slow and low is the way to go. At first when you start the instinct you get is to race around like a headless chicken trying to cover the field as fast as you can trying to find stuff, then after half an hour you think there's nothing in this field and try another one. You can miss a huge amount of ground like that, also a lot of finds.
One way that's accepted is on a new field do the Union Jack method. Detect all around the edges and then detect corner to corner. On a large field split it into sections by taking notice of any markers like gates, trees etc on the fields edges. If you hit any hot spots, cover that area well.
Remember to slow down. This cannot be stressed enough. You have to slow down in order to allow your machine to process the signals.
Patience, Persistence, Knowledge
BEACH METAL DETECTING
Beach metal detecting can be one of
the most rewarding yet challenging places to use a metal detector. Below
are some info and tips that I hope you will find helpful done in a sort
of question and answer style.
WHY DOES MY DETECTOR GO CRAZY ON THE WET SAND?
Salt water is highly conductive and the mineralization of the sand will give off signals. Look at it as an inland field full of rusty nails. To combat wet sand mineralization you have to ajust your ground balance, discrimination and sensitivity settings turning them down low. The drawback is loss of depth. Some low end detectors are just not meant for the wet sand and best used only on the dry. Some mid level detectors also struggle with the wet sand but can be ajusted to combat the wet fairly well. Even some high end detectors will struggle but again, can be ajusted to combat the wet.
ARE ALL BEACHES THE SAME?
Nope, not all beaches are the same as far as salt concentrations and magnetic black sand go. You may find your machine seems to work ok on one beach, but on another it goes crazy. On black sand its even worse.
WHAT SORT OF DETECTOR IS BEST FOR THE BEACH?
Without a doubt on wet sand the best sort of detector is a Pulse Induction (PI) machine. These machines are purposely designed for beach detecting. Most good VLF machines can also do the job but if you want to take beach metal detecting seriously I suggest a PI machine. The reason being at the beach the salt water amplifies the normal ground minerals causing many land detectors to chatter and give false signals. With a VLF detector you will need to have one with a ground adjust control. This helps you to tune into the mineralization reducing the noise. With a PI detector they are built to simply ignore the effects of mineralization. All machines work good on the dry sand.
WHAT OTHER DETECTING ACCESSORIES DO I NEED?
A digging tool for sure. One of those long handled sand scoops are best or a small hand held one. For the wet sand a shovel does the job. Also a finds bag for all the trash so you can take it away and dispose of it.
WHAT SORT OF OBJECTS CAN BE FOUND AT THE BEACH?
The majority of the finds will be recently lost items like modern coins, jewellery, mobile phones and other personal property lost by the owner. Be prepared for the trash like pull tabs, bottle tops, silver paper, etc. Don't try to discriminate this trash out as an example a small silver ring can produce the same reading as a pull tab, by discriminating the pull tab out you will also discriminate the ring. You are also in with a chance of finding older stuff but most of it is buried way to deep for us to reach. There's a bit on this further down the page.
THE BEACH IS MASSIVE, WHERE DO I START?
The best place to start metal detecting on a beach is where they call 'the towel line'. This is where the majority of people congregate. Where they sunbathe, picnic and just relax. Its always up on the dry sand above the high tide mark. If you don't know where the towel line is just look at photos or postcards and see where they are mostly congregating.Another good place to start is at the points of entry and exits to and from the beach. or, check out around the places where they sell stuff, like ice creams etc. Some beaches have sports like volley ball, football etc, these are also good to check out. These are all hot spots up on the dry sand. A trick I use is to drag my spade behind me as I'm walking along detecting, that way it makes a line in the sand and shows me where I have been so I don't walk over that area again.
WHAT ABOUT ON THE WET SAND?
When venturing onto the wet sand, first look for gullies or troughs cut into the sand, these are low spots and worth checking. The best area they say is the middle section of the low water mark and the high water mark. Seems stuff collect in this area more than others. Now the best areas are those stripped of sand by storms, look for the black sand on hard pack. This is where most finds will have sunk to in the sand and rest there. Also this is the place to find the older stuff. Keep an eye out for loads of stones and shells, also large rocks without seaweed on, as this will tell you lots of sand has been stripped off. Many detectorists love detecting right down at the low waters edge.
LOTS OF PEOPLE DETECT THE BEACH, WILL THERE BE ANYTHING LEFT FOR ME?
Keep in mind that the beach is always changing by the forces of storms, water currents, wave action and wind directions. Where on land on some fields you have a plough to bring finds from deeper down up to within reach of our machines, you could say that storms etc are natures plough on the beach. Finds get washed about as the beach moves and changes.
WHEN IS THE BEST TIME TO GO?
In the winter months a good time is right after a storm. A beach can get stripped of sand overnight revealing the hard pack below. You have to be quick tho as the next high tide can push the sand back up the beach. In the summer months its best before people start arriving on the beach, or after they have left, so early mornings or late afternoons/evenings. A lot of detectorists have full time jobs during the week and can only detect at the weekends, if you can, go there for a Friday evening session, that way you will beat them for the recent losses. Sunday evenings or Monday mornings are also a good time.
LAST POINT. As with metal detecting on land, don't forget to fill in all your holes and take away any trash you have found.
Tips and Tricks
Spit and Foil Test for Silver.
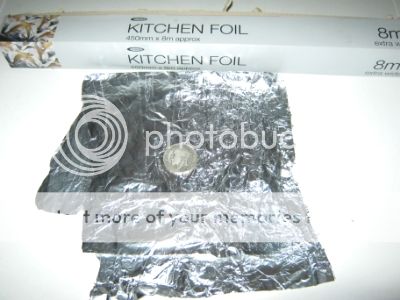
Get a piece of kitchen tin foil and place the silver object your testing on the foil, I'm using a 1929 half crown here. Its best to leave the silver object tarnished. Before you do anything sniff the silver object on the foil to get an idea of the smell beforehand..
 Now
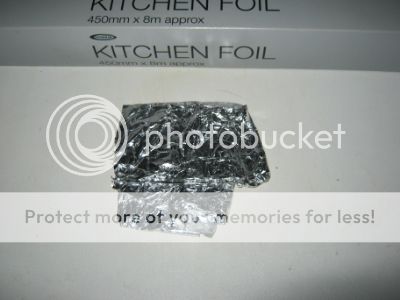
pick up the silver object and spit on it, gently rub the spit all over
the object and place back on the foil. Wrap the object up tightly in the
foil and leave for 10 - 15 seconds.
Now
pick up the silver object and spit on it, gently rub the spit all over
the object and place back on the foil. Wrap the object up tightly in the
foil and leave for 10 - 15 seconds.Then just unwrap the silver object and have a quick sniff. If its silver you will smell a very strong 'eggy' smell, just like rotten eggs. You will notice straight away as the smell is unmistakable and strong. Try this with something that you know is silver so that you can see it works.
What happens is the enzymes in your spit react with the tarnish on the object producing hydrogen sulphite, which is that awful sewer/rotten egg smell.
Apparently this test is not 100% and sometimes will not work, but is a good general guide.
GARRET PRO POINTER
An excellent Garrett Pro-Pointer tip on how to retune this metal detector accessory to pinpoint specific targets. In this video you will learn a little known trick helping you to find those difficult to locate targets much easier. This simple trick works on both small and large targets.
AIR, BENCH, BURIED TEST
Some say air and buried tests are not worth doing as it does not mimic a
coin that has been buried for a hundred/thousand years. I agree with
that it does not give a same result, but, I think these tests are still
worth doing for a few reasons. It can show what your machine is capable
of, how different the sounds can be on different targets, shows what
metals can be found deeper than others, shows how fast recovery speed is
and also the best reason it allows you to play about with the controls,
sensitivity, discrimination, etc. With an air/buried test it will show
you right away how turning your sensitivity control can effect depth.
 Some
detectorists make a test bed and bury a coin at different depths,
others set up a bench test. I've done these two things myself. For a
quick test here is a tip if you want a bit of both and simple to set up.
Some
detectorists make a test bed and bury a coin at different depths,
others set up a bench test. I've done these two things myself. For a
quick test here is a tip if you want a bit of both and simple to set up.First, as with the air/bench test make sure there is no metal laying near or under where your testing. I use my concrete path as I know there is no metal mesh in the concrete. All you need is a selection of coins, a few paperback books and a tape measure comes in handy. I then lay a coin down on the concrete and then put 3-4 books on top of it. Swing machine over it and if a nice clear dig-able signal, I add another book. If the last book you put on makes the signal fade, then that's your depth.
 At
this depth mark is a good time to play about with your controls. See if
you can improve the depth or signal by ajusting sensitivity,
discrimination, etc. For an experiment turn your sensitivity control
down from full and watch the depth disappear. Try different coins and
odds an ends. I like this tip as you don't have to keep re-digging your
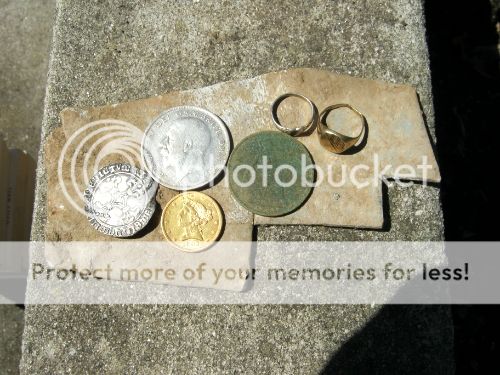
coin out and reburying it. Just remove the books. I used two small
rings, gold and silver, a gold coin, a silver hammered, a half crown,
and a copper pre-decimal penny. The results I got were penny 9", half
crown 10", hammered 9", silver/gold rings 8" and that large piece of
flat lead 13". As I said, this test can't mimic an object that's been
buried for years but it can give you some idea how your machine operates
with different metals and what an object's sound can be when
deep.....Have fun.
At
this depth mark is a good time to play about with your controls. See if
you can improve the depth or signal by ajusting sensitivity,
discrimination, etc. For an experiment turn your sensitivity control
down from full and watch the depth disappear. Try different coins and
odds an ends. I like this tip as you don't have to keep re-digging your
coin out and reburying it. Just remove the books. I used two small
rings, gold and silver, a gold coin, a silver hammered, a half crown,
and a copper pre-decimal penny. The results I got were penny 9", half
crown 10", hammered 9", silver/gold rings 8" and that large piece of
flat lead 13". As I said, this test can't mimic an object that's been
buried for years but it can give you some idea how your machine operates
with different metals and what an object's sound can be when
deep.....Have fun.
HOME MADE SAND SCOOP
You may have seen this idea around the internet on other sites, that's
how I found it. If you have not seen it before, here's a great home made
sand scoop. Just click pictures for a larger view.
This one I made last year and have used it a lot, mainly on a shingle beach. I found digging the shingle with a spade was a pain, the more you dug out, the more fell back in from the sides covering the target even more. Its also ok for the dry sand on a beach, but on the wet a spade is more better. If your agile enough you can push it into the shingle or sand with your foot while holding the handle to get more out in one scoop. Much faster digging than a proper hand scoop that you can buy. Also this one cost me nothing as the can had been laying in my shed for yonks.

As you can see the plastic petrol can is cut at a slight angle, maybe a bit more of an angle would have been better. I used an ordanary wood saw to cut it. The holes I drilled are just slightly smaller than a 5p piece. Strength wise its very strong. I've used this one many times and there is no sign of a weakness anywhere on it.
So, if your bored one day and have an old plastic petrol can laying around, give it a go.


EXCELLENT BOOK
Most
metal detectorists will remember the late John
Lynn, better known as the Norfolk Wolf. Sadly he died on the 14th
September
2011, but he has left behind a wealth of information about metal
detecting. From magazine articles, to books, U-Tube videos and DVDs. He
became one of the country's leading authorities on metal detecting. 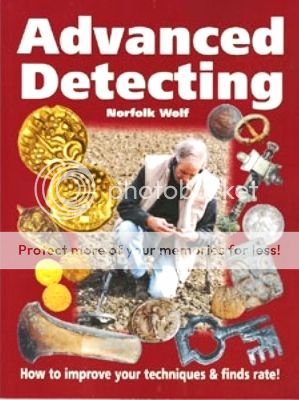 When I first started metal detecting I joined an
online metal detecting forum and someone on there recommended a book called
'Advanced Detecting', by Norfolk Wolf. It was about how to improve your
techniques and find rates. I had never heard of the Norfolk Wolf at that time
but what people on the forum were saying about him prompted me to buy his book.
When I first started metal detecting I joined an
online metal detecting forum and someone on there recommended a book called
'Advanced Detecting', by Norfolk Wolf. It was about how to improve your
techniques and find rates. I had never heard of the Norfolk Wolf at that time
but what people on the forum were saying about him prompted me to buy his book.It was the first book I had ever bought about metal detecting and I can seriously recommend it.
The book describes everything you want to know about metal detecting including how to understand your machine, all about mineralisation and ground effect, discrimination, sensitivity, signals, depth, recovery speed, and a whole lot more. This book has been described as the Metal Detectorists Bible. Beginners and experienced detectorists whatever their level will find this book a wealth of knowledge as I have.
You can review and buy this book at Amazon here: Advanced Detecting By Norfolk Wolf.
THIS TEST IS GOOD FUN
Make a bit of time to have a go at this great metal detecting tip. Not
only will it improve your metal detecting but is also fun.Get together an assortment of general metal detecting finds like pull tabs, bottle tops, nails, old coins, coke cans, silverware, keys, washers, jewellery, rings, or some other treasure. Make up some some small cards say 3" by 2" and write the name of each object on one card.
Now get someone to randomly place some of the objects in a say 10' by 10' area in your garden and cover them with a tarpaulin. Now go out and practice finding the objects and place the right cards on the right objects. Keep your detector a good 6" above the tarpaulin to stimulate the objects being buried. It won't be long after practicing this a few times you will be able to generally identify objects before you look at them. Very good experience for when you are actually out detecting a field or beach.
Best to do it in the different modes on your machine so you can learn the different signals. For instance in all metal mode you should be able to find all the objects but a little trouble identifying them. In the discrimination mode, depending on the amount of discrimination you use you may not find some objects that are considered trash, and that's good. Practice is the key, and it can help your detecting become less frustrating and more enjoyable.
Some great Tips on here loving the sand scoop I know what i am making this weekend
ReplyDeleteThanks John, and good luck with it. I made mine over a year ago and its still going strong, excellent for shingle and dry sand.
ReplyDeletegreat tips, out of curiosity what detector do you use?
ReplyDeleteHi there, I'm currently using an XP Deus. The two main reasons I went for this machine was for its lightness and it being cordless.
DeleteHello.
ReplyDeleteI am wanting to find out about the strength of metal detectors and their capabilities of detecting very small pieces of metal - also advice on which types of metal are the most detectable. It would need to detect it from 0-30cm below ground if possible. This is for some potential research I am doing in Cornwall. I also wondered if you know of anywhere to loan detectors from?
Excellent blog, John. I am also 61 and although I had a metal detector over 40 years ago, the technology has certainly changed, and my old knees have gotten very creaky. I have just purchased a Minelabs GoFind 40 because it is reported as being an acceptable low budget beach machine. I've got my knee-pads out and am raring to go.
ReplyDeleteAs a newcomer to metal detecting it`s been an excellent and interesting read with lots of informative advice. I cannot wait to get started.
ReplyDeleteThese are some great tips that I can look for when buying a Hand Held Metal Detector India. What kind of metal detector do you use?
ReplyDelete